Soil erosion is a widespread problem worldwide. Despite playing an equally important role in keeping the planet together, soil is often overlooked as an essential resource that supports life and biodiverse environments on the planet. The United States National Resources Defense Council even goes as far as saying – through an article – that soil, seemingly, is “one of the planet’s most underappreciated natural resources.”
People often express their appreciation for verdant and lush greeneries in rainforests and the vibrant flowers that bloom endemic to special places, but very few people voice their admiration for healthy soil. This is why problems that further progress and worsen the effects of soil erosion are often forgotten and ignored.
This science fair project seeks to demonstrate one of the most popular solutions to soil erosion through a reconstruction of a certain environment. This experiment makes use of simple components you can assemble to piece together a microcosm of the soil erosion problem – and perhaps a solution – the planet has today.
Introduction
Soil erosion has a profound effect on life on Earth. In fact, the World Wide Fund for Nature claims that “half of the topsoil that existed on the planet has been lost in the last 150 years.” Human activity, at this point, has become an agent of soil erosion – even efforts toward agricultural development.
To encourage the youth to contribute to the effort and cause, it’s important that they’re given a chance to learn how they can help combat this global threat. This science project will help children understand the importance of plants and the power they possess. The concept of this experiment revolves around the presentation and demonstration of how natural vegetation aids in lessening soil erosion. This is possible through the crafty use of household resources, containers, soil, some plants, and water.
Science fair projects and experiments often span quite a long time, and this recommendation is no different. To yield the most realistic results, you will need at least two weeks to four weeks to perform to complete the experiment. The experiment, particularly, takes up a long time because to yield the best and most reality-based results, the design involves growing actual plants.
To replicate how real plants interact and establish their roots deep within the soil, this experiment will involve actual planting. You will be taking care of a few plants to make sure that nature runs its course, hopefully providing results similar to how plants would keep soil safe in actual environments around the world. The experiment is designed to replicate two circumstances: soil erosion on hills with no vegetation and soil erosion on hills with plants. This is where the challenge lies.
Contrary to the time you invest in this project, this project is very affordable. You will only need around $50 for this project and some household resources to supplement the equipment demands of the experiment. The project bears heavy inspiration from a science project Riya C. submitted in 2015 and Ben Finio Ph.D.’s entry on a science and learning-based website.
Key Concepts
To help you understand this experiment better, it’s important to gain a better grasp of key concepts that paint the problem and how this project impacts the real world. This will allow you to share and explain the many ways people can get involved and do their part in reducing soil erosion and, by extension, its adverse effects.
Soil Erosion
Byju, a learning and cutting-edge tech company, defines soil erosion as “the natural process in which the topsoil of a field is carried away by physical sources such as wind and water.” This problem has cost the world billions worth of dollars every year as it washes pollutants into bodies of water, like streams and rivers.
This problem also causes agricultural damage as it damages farmlands globally. According to WWF research and studies, the Earth has already lost half its topsoil in the mere 150 years that had passed. The dangers of soil erosion have also been proven to impact beyond just the loss of fertile land.
Soil erosion is also responsible for increased pollution and sedimentation in bodies of water. This pollution of the world’s waterways causes declines in fish and other organisms in the water. It has also been observed that areas with advanced levels of soil erosion have a high occurrence of floods.
As soil becomes more and more of a threat to lives worldwide, global institutions look to sustainable land use. World experts believe that sustainable land use helps reduce the effects of the agricultural and livestock industry to assist in preventing the further deterioration of soil, erosion, and the loss of valuable land.
Causes of Soil Erosion
Soil erosion naturally occurs on Earth. However, human activity has not only given way to artificial causes of erosion but has also polluted the soils that nature naturally erodes. This project will also explore the many forces that play a hand in soil erosion and even make use of one particular agent for the experimental design.
Rain and Flood
Strong rainfall and intense flooding are one of the most common and main ways the world naturally erodes soil. Rains and floods cause four types of erosion: rill erosion, gully erosion, sheet erosion, and splash erosion.
These erosion types happen because of the raindrops that disperse the soil. The strength of the rainfall washes the soil into the streams, rivers, and bodies of water around the sources’ proximity. Despite being completely natural, human activity has influenced the intensity of floods through activities that damage the environment. Such activities make floods more intense and more common, causing tragic damage that makes soil erosion even worse.
Agricultural Machinery and Industry
Ironically, human agricultural activities like farming practices are among the biggest contributors to soil erosion. Agriculture causes a disturbance on grounds the world over. To create farms and agricultural structures, trees that help keep soil erosion at bay are cut down. People cut trees and plow lands to sow seeds to create food sources.
The vehicles and machinery that make agriculture prosper have tires that bear down on the land. These things create pathways for water that creates more erosion. The wind also erodes fine soil particles that agriculture yields.
Logging and Mining
It has long been established that trees keep the environment healthy. At the same time, however, wood, rocks, minerals, and timber are one of the most vital resources in the field of construction, engineering, architecture, and many other industries. This importance is why logging and mining are widespread around the world.
However, this resource-gathering spree comes with a price – widespread soil erosion wherever these industries may be. Large numbers of trees that could be helping keep ecosystems alive are cut all over the world for wood and timber. Mining activities, on the other hand, disturb lands and make the soil on sites more susceptible to erosion.
Construction Efforts
Despite being a sign of progress and development, increased construction activities in communities herald soil erosion. The construction of structures and infrastructures endangers the land they rise on to soil erosion. When communities rise, forests and grasslands are cut down and cleared for the construction site. These activities make soil vulnerable and prone to erosion.
Plants and Soil Erosion
Studies reveal that water and wind are responsible for around 84% of degraded and eroded land. Despite being a natural phenomenon, erosion has the ability to make once vibrant forests look like wastelands in their wake. One of the most prominent efforts to control erosion is through the use of plants and vegetation as an ingenious solution.
Serving as a protective layer that reduces the damage of soil erosion, plants, and their roots, binds the soil they stand on together with systems upon systems of limbs that reach far below the surface.
Plants and trees help combat erosion in a variety of ways. For one, the root systems plants have that firmly hold them in place slow down water as it flows through the soil, acting like barriers of sorts that keep the soil together to diminish vulnerability from erosion. The roots also maintain and retain the soil’s position to keep it from being washed away by torrents of water and strong gusts. Trees even protect the soil from direct rainfall, breaking raindrops before they hit the soil below and preventing runoff.
The most effective plants that help stop soil erosion are groundcovers, shrubs, grass, and trees. These are natural solutions that help stop and solve the problem of soil erosion through extensive root systems and protective properties.
The Experiment
Now that you understand the important concepts that paint a complete picture of the challenge at hand, it’s time to proceed with the experiment.
The problem humanity faces at the moment is their belief that they have no power over the problem – that they can’t be part of the solution. One of this experiment’s primary goals is to show people, especially today’s youth, that they can help and contribute to saving the world. There’s more power in people’s hands than they think and believe. It all starts with believing in the power of plants. This experiment is designed to inform, raise awareness, and convince people that they can be part of the effort to save the world too.
This experiment revolves around the premise of comparing how two sets of samples – one a container of just soil and another of soil and some plants reduce soil erosion. The point of comparison is the samples’ ability to keep the soil in the containers intact. For this experiment, erosion will be represented by controlled amounts of water poured over the samples, testing how well they hold the soil together and observing whether the sample without seeds or plants or the one with seeds or plants performs better.
The experimentation phase of this science fair project consists of four primary parts. First, you will be preparing the resources you need to execute the experiment. Then, you will plant some seeds and care for them until the day of testing. Next, you will be testing which sample works better against agents of erosion like water. Finally, you will be putting the samples to the test, discovering the ways how plants help erosion, and sharing with your viewers the many things they can do to help the environment.
Materials, Equipment, and Tools
The things you need for this experiment are readily available in nearby malls, groceries, and maybe a hardware store. Most of these resources are easily accessible online as well if you prefer that procurement method better. The measuring equipment is straightforward and can usually be found in typical households.
Here’s a list of things you’ll need for the project:
Six aluminum bread pans,
Two Aluminum cake pans,
Soil
One small bag of radish seeds
A ruler
Sticky notes
Permanent markers
Scissors or a sharp knife
Full-size watering can
A sunny area for plants
A test area where you can make a mess
A stopwatch
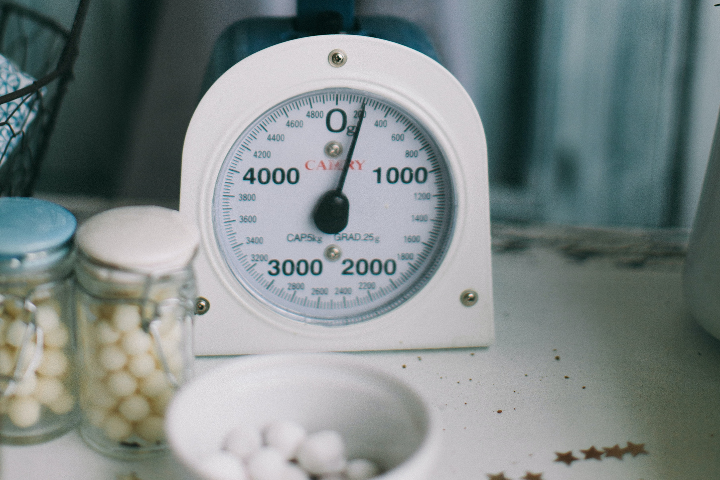
A kitchen scale
Lab notebook
The aluminum bread pans should measure approximately 8 × 3 × 3 inches, while the cake pans should measure approximately 12 × 8 × 1 inches. The soil should be enough to fill all these pans. There is potting soil in hardware stores or garden centers, so you may need to look into those shops. However, if the soil in your area is good enough to grow vegetables, you may opt to use those instead.
Radish seeds are available in hardware stores and garden centers as well, so you may check these shops if you don’t have radish seeds lying around. The watering can should be the actual gardening tool, not the toy, as this experiment is very particular about this certain resource. The spout of the watering can should be the rain type, not the single-hole spout. If you don’t have gardening equipment at home, you may find these in hardware stores.
You also need something to prop one edge of the bread pan by about three to five centimeters. This is an important component of the test. Remember not to use something you don’t want to get wet as this will involve water. The kitchen scales can be a bit tricky, but there are options available online.
It’s important to remember that accidents happen, and keeping extra units of the important materials is recommended. Once you procure all the needed resources and have scouted possible testing sites for the experiment, you may start planting the seeds for tests ahead.
Preparing the Plants
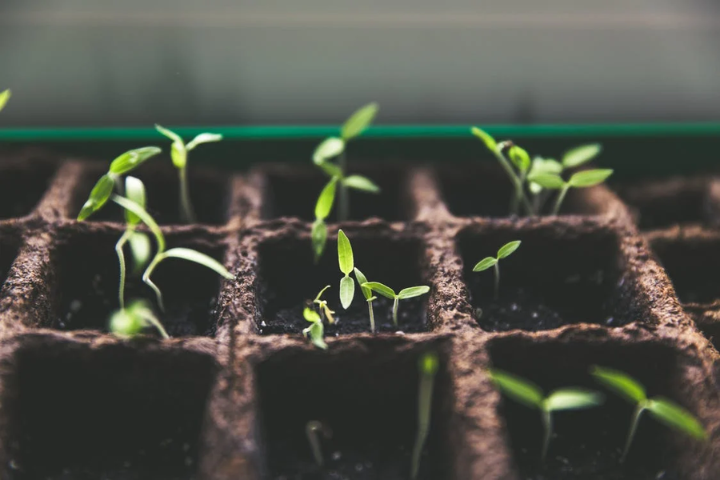
The plants will serve as the samples for the experiment, so taking care of these seeds is an essential part of the study. You will need to care for these plants for two weeks to for weeks to ensure that the seeds grab hold of the soil. You don’t need fully grown plants – the seeds just have to be mature enough to have reached into the solid with their root systems.
Follow the steps below to ensure that the samples are testing-ready and healthy.
Step One: Fill all six of the bread pans with soil. Make sure not to fill it up to its brims, as you will need to leave some space around the top and ensure that the soil doesn’t flow or pour over the edges.
Step Two: Set aside three of the bread pans and label the other with “no seeds” and the other with “radish seeds.” Plant the radish seeds in the three bread pans you labeled with “radish seeds.” Also, label both groups with trial numbers (trials numbers one to three), so the final labels should be a pairing of trial numbers and “no seeds” or “radish seeds” classifications. At this point, you should have two groups of three samples. Label three of the bread pans as “no seeds” and trials one to three, and label the other three as “radish seeds” and trials one to three.
Step Three: To know how to plant the seeds, instructions are often printed behind the seed packets. Check how far apart the seeds should be according to the print on the packets and plant the seeds closer than the instructions recommend. If the instructions say that the seeds should be planted an inch apart from each other, then plant the radish seeds just half an inch away from each other.
Step Four: Use the knife or the scissors you prepare to puncture holes at the base of the soil. The holes should be at the sides of the very base of the bread pans to get rid of excess water and avoid overwatering. These will be important drainage holes that will drain the water out of the containers.
Step Five: Position the bread pans into the wider and larger cake pans. If you follow the recommended sizes, you should be able to fit three bread pans into one cake pan, allowing you to separate the “no seeds” samples from the “radish seeds” samples.
Step Six: Position the cake pans somewhere near a sunny window or the area of your choice. If the weather is appropriate, you can place the pans outdoors. Make sure the samples receive direct sunlight as much as possible during the day. Remember that if the area is too hot and dry or too rainy and wet, the plants may die, compromising the experiment. Failure to suture the plants will result in starting over.
Step Seven: You will be watering the samples gently once a day for the next seven to ten days. You will know when the plants are ready for the testing phase when the plants are eight to ten centimeters. There may be cases when you need more than ten days as the samples’ growth will rely on many factors like temperature, exposure to sunlight, the amount of water the plant receives, and the quality of the soil you use.
These are the steps for preparing the plants. To make sure you care for the plants the right way, there are a few more pointers to remember. Make sure that when you water the plants, you use the rain spout to ensure that there isn’t too much force on the gardening can. If you don’t water the samples gently, it may move the seeds around, compromising the test. The goal is to get the soil wet but not flooded. If the water accumulates in the cake pans, this means you are overwatering. If this happens, drain the cake pans and reduce the amount of water you apply.
Remember to water both samples – the ones with seeds and the ones without seeds. You have to expose the sample to identical conditions to ensure the integrity of the data you gather later on. It’s important to remind yourself that you are simulating similar rainfall conditions.
After about ten days and the plants eight to ten meters high, it’s time you move to the experimentation phase.
Testing For Soil Erosion
Before you move forward with the experiment, you will need to devise a table so you can record the results of the test in an organized manner. Here’s a recommended format you can use for the test:
Soil Mass (g)
Soil Type
Trial 1
Trial 2
Trial 3
Average
Seeds
No seeds
The way this table works is after each erosion test, you will be recording how much soil the water erodes using the kitchen scale. With this in hand, you are ready to move forward with the test.
Erosion Test
Set up the testing area by using your kitchen scale to record the mass of an empty cake pan. Make a note of this measurement in your notebook, as you will need this later on. Take the samples and make two vertical cuts halfway down on just one of the short sides of the pan to expose part of the soil. Make sure not to cut into the pan too deep, as the goal is to give way for the soil to flow out during the erosion test.
Make sure to dry the pans (if necessary) and empty them before you start the test. Position the bread pan – one of the samples – on one end of the cake pan, tilted over the edge to simulate a downhill surface. Make sure to tilt the bread pan at about three to five centimeters high. You may use a container to hold it up or something else that can prop the pan up as you execute the test, maintaining its tilted position.
Once you have these conditions met, it’s time to start the erosion test. The erosion test involves a rain simulation using the gardening can.
Step One: Fill up your watering can. For each time you fill the watering can up and finish each test, make sure you maintain the same amount of water every refill throughout the test. This ensures that each sample goes through the same amount of challenges throughout the test.
Position the watering can high enough so that the water you pour through the rain-type spout hits the entire pan all at once. This allows you to accurately portray a rain simulation as it sweeps across hills, covering wide areas.
Never hold the watering can too close to the bread pan, as this will hit concentrated areas that will yield bad results and compromise your data. Pour water over the samples five seconds each time, using your stopwatch to guarantee accuracy.
Step Two:
Now that you’ve finished the rain simulation, you may lift the bread pan from the cake pan and its tilted position. Do this with care, as you may spill more dirt into the cake pan if you do it brashly. Set the sample aside and shift focus onto the cake pan with the eroded soil and water.
Step Three: Drain the cake pan carefully until all the water is gone and all you have left is the soil. Make sure that as you separate the soil and water, avoid spilling any of the soil from the test, as this will determine how well the sample performed in this erosion test. Losing the soil would impact the results.
Step Four: Use the kitchen scale you prepared to measure the mass of the cake pan and the leftover soil. Remember when you took note of the cake pan weight? Subtract that amount from the mass of the cake pan and soil, leaving only the mass of the soil that the water eroded from the rain test. Record the final value – cake pan mass subtracted from the combined mass of the soil and the cake pan – onto the table you prepared for the experiment.
Repeat these steps for all of the samples, recording the mass of the leftover soil each time on the table you prepared. Make sure you pour an equal amount of water for each rain test and for an equal amount of time as well to make the circumstances as identical as possible.
Analyzing the Results
Present your data using graphics that accurately synthesize your findings. Share the experiment with your audience to impart the profound impacts that plants have on the environment.
You may solve for the average value of the mass that the eroded soil samples produced throughout the rain simulation. You may compare the performance of the samples that have seeds and the samples that don’t and draw your conclusions.
With your data in full view, do you think plants reduce the effect of soil erosion due to rain? How do you think this should affect the world? How can humanity use your findings to take part in the battle against erosion? How do real-world simulations compare with the results of your experiment?
Hi, my name is Elena Jones, and my full-time job is a teacher. Through teaching, I have discovered that children learn in many different ways, and have seen the positive impact both STEM and Montessori toys have on children.
Through this site I hope to educate parents and adults about these toys, providing them with useful information on how they can be used, and provide some in depth reviews of different toys to consider too.


")
")


