A trip to the beach wouldn’t be complete without a good old-fashioned sandcastle session. Sandcastles, entertaining as they are, are more than just loads of fun. The activity is deceptively educational, bringing together STEM-powered play, an amazing sensory experience, and a great time at the beach.
With the sensory play comparable to the effects of kinetic sand and the STEM-heavy education of engineering and scientific concepts, building sandcastles is simply a multi-faceted learning adventure that kids will surely want to try over and over again.
For kids, building a sandcastle can be a form of expression and a way to expand the boundaries of what they can create with their own hands and minds. With this mission set, parents and guardians can then come in with a purpose of their own: to help children create their breakthroughs by guiding them on how to create the best creations they can produce.
The first step that you, as guardians or parents, have to take is to show them the ropes in creating the most amazing sandcastles. Not sure how to do that yet? After reading this article, not only will you be able to show your kids the ropes but you will also be able to throw in a lifehack or two in the process. Read further for both the fundamentals and the hacks on creating an exciting yet educational time in making sandcastles.
The Fundamentals
You need only a few things to get a decent sandcastle going. But for those who strive for taking their sandcastle game to the level, these tools of the trade can be deceptively basic. Here’s a quick list of things you need at the beach:
Sand
Water
Some digging tools
Some carving tools
Before you move to the actual building, it’s important to know how these tools are going to help you in building your sandy fortress of solitude. You will also need to understand the role the tools will play in creating the sandcastle itself.
Sand
Sand, for example, is often misconceived as the end-all-be-all ingredient for sandcastles. This is not the case. The most basic yet most important thing your kids need to know about sand is that it doesn’t stand on its own. To create an enduring sand structure, builders will need to moisten the sand with some water. When you add water to grains of sand, the liquid creates “bridges” that link the granules to each other. This is the same process that transpires when damp sand sticks together. This allows sand to become a malleable mass, enabling people to shape and carve it in a variety of forms.
Here’s your first lifehack: pack down the wet sand tightly. This method drains massive amounts of water more quickly, allowing your young engineers to build even shorter bridges that can yield even more solid clumps. Tightly packed sand that has been compressed using this method can withstand extreme carving.
Water
When handling water for your sandcastles, make sure that you use generous amounts of liquid. Dry sand, especially when not compacted thoroughly, easily falls apart. To improve its constitution, you can use water and some pressure to drastically enhance its structural integrity.
However, this process will still need some care in execution as there will be a lot of draining and straining involved. Anyone who’s tried using wet sand as the base of their sandcastles will know that undrained grains would be difficult to remove from the bucket.
The last thing to remember is that when using the sand to form your structures, pound the sand as closely together as possible. To fortify the walls of your sandcastles and avoid erosion, tighten those bridges that hold the grains together tightly.
Here’s your next lifehack: dig a water hole. Taking a two-way trip to the shore can take a lot out of the kids. To remedy this concern and conserve some energy for more sandcastle-making fun, you can dig a waterhole nearby.
This lifehack is exclusive to those builders at the beach. A watering hole can provide an unlimited supply of water for your construction needs. All you need is to keep digging. Dig until you finally hit water. For your watering hole, you’re aiming for depth rather than the width so don’t worry about how wide the hole is. After some time digging, when the water starts puddling and gaining some depth at the bottom of your hole, you can stop digging.
Generally, the ideal water to sand proportion for your sandcastles is one part sand for every one part water. You can pour the water into your bucket first, then shovel in the dry sand after for better blending.
Digging and Carving Tools
Technically speaking, anyone can dig, compress, craft, and carry water with just their hands. But if there’s anything that can be said for certain, the right equipment will yield better efficiency and better results.
Here are some tools that are essential for the best sandcastle results:
Shovels
Buckets
Carving tools
Shovels are used for digging so preferably, if you prefer some altitude, you should use a long-handled and lightweight shovel. For buckets, the more you have the better, but if resources are limited, just one or two will do. For carving tools that you’ll be using for smoothing and shaping, any safe flattener from the kitchen will do.
Building the Castle
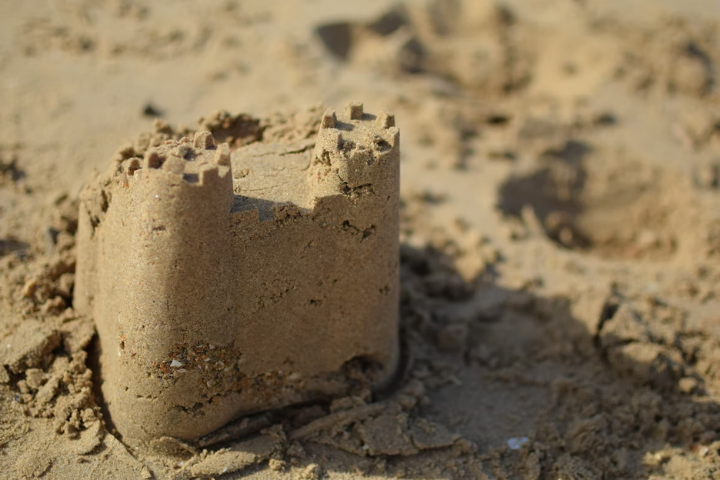
The key to an amazing sandcastle is to create a dynamic form. While the uniformity of structure can still make for an impressive build, a structure with a variety of shapes will surely leave children with a more striking impression. Here are some architectural designs you can try:
Towers
Creating towers may take some skill. In essence, towers are just stacks of sand with refined edges. The key here is water and compacting. The more water you have in the sand, the longer the tower will last. The more compacting you do, the more refined and strengthened your tower will become.
Walls
Walls can be a great way to connect towers and other structures together. It’s easy to make, too. After you give some sand a good amount of water and some rinsing, mold them into a stretched structure that covers your other structures or connects your towers. Use your hand to flatten them and provide some altitude to the walls.
Arches
Arches can be hard at first. In principle, the apex of the arch holds the entire structure together. Before you make the actual arch shape itself, you can start by making tunnels out of walls. As you start getting used to creating gaps on structures, you may start refining the shape until you get a hang of arch building.
Sandcastles are educational and entertaining, surely. With its components of engineering, sensory play, and other STEM-related benefits, sandcastle building will definitely have a place in every child and parent’s to-do list.
Hi, my name is Elena Jones, and my full-time job is a teacher. Through teaching, I have discovered that children learn in many different ways, and have seen the positive impact both STEM and Montessori toys have on children.
Through this site I hope to educate parents and adults about these toys, providing them with useful information on how they can be used, and provide some in depth reviews of different toys to consider too.


")
")


")
")
Pingback: Experiments for Kids: The Paper Cup Telephone - Spiral Toys